


sarvan
-
Posts
18 -
Joined
-
Last visited
Content Type
Profiles
Forums
Events
Gallery
Everything posted by sarvan
-
Hi @BogdanVanca After including the patch the issue is resolved. But we are facing the another issue during the bit stream generation. Error log ImplementationWrite Bitstream[Common 17-69] Command failed: This design contains one or more cells for which bitstream generation is not permitted: system_i/v_hdmi_tx_ss_0/U0/v_hdmi_tx/inst (<encrypted cellview>) system_i/v_hdmi_rx_ss_0/U0/v_hdmi_rx/inst (<encrypted cellview>) If a new IP Core license was added, in order for the new license to be picked up, the current netlist needs to be updated by resetting and re-generating the IP output products before bitstream generation. Your help is much appreciated. Thanks, saravanan
-
Hi, We generated the BOOT.BIN with fsbl,pmufw,atf,bitstream,uboot using the bootgen tool and flashed to the QSPI memory.The target is booted from QSPI memory successfully. Then we prepared the boot image for the SD card with fsbl,pmufw,atf,bitstream,uboot and image.ub,boot.scr and copied to SD card through TFTP transfer and and also manually. The target is booted form the SD card successfully. For the TFTP transfer we connected the target in the QSPI mode and boot up to uboot stage and then transfer the boot images to the SD card using the TFTP transfer method. when we tried to do the TFTP transfer again the boot image at the QSPI is not booting properly. Please find the error message in attachment. Thanks, saravanan

-
Hi, We are using the Genesys ZU5EV board, We download the petalinux project from the digilent git hub which support the zeus yocto version. We planned to upgrade the petalinux project to support honister or the later version of the yocto. For that we required the XSA file for the petalinux project to configure and build process. Could you please share us the xsa file for the latest yocto version(honister or later versions) Thanks, saravanan
-
Hi @JColvin We cloned this repository and We used the Vivado 2020.1 version to build the project. https://github.com/Digilent/Genesys-ZU-HW/tree/5ev/master We tried to generate the bit stream but facing the in the sysnthesis level. The error is system_v_tpg_0.dcp file is not found Attached the screen shot for you reference. Your help is much appreciated. Thanks, saravanan

-
Hi, We are using Genesys ZU-5ev (zynmp soc) board. We did build project using genesys git link https://github.com/Digilent/Genesys-ZU-OS/tree/5ev/master We want to update yocto version to latest yocto like honister or kirkstone. Please provide any inputs how to upgrade yocto version on existing genesys project? Which configuration file genesys project should be changed to upgrade the yocto SDK to latest supported yocto version? Please help! Thanks, Saravanan
-
HI, We downloaded the petalinux project from the below link https://github.com/Digilent/Genesys-ZU-OS.git How to configure the systemd in the petalinux project. we tried by adding the below line local.conf file. But basic logind service are failed. DISTRO_FEATURES_append = " systemd" VIRTUAL-RUNTIME_init_manager = "systemd" VIRTUAL-RUNTIME_initscripts = "systemd-compat-units" Could please help on this. Thanks, saravanan
-
Hi, We tried petalinux package --wic command for both images built using 1. minimal_image (petalinux-build) 2. full_image ( petalinux-build -c petalinux-image-full) Error occurs after kernel loading. we attached the error log. Thanks, Saravanan Full_RootFS_wic_image_err.txt
-
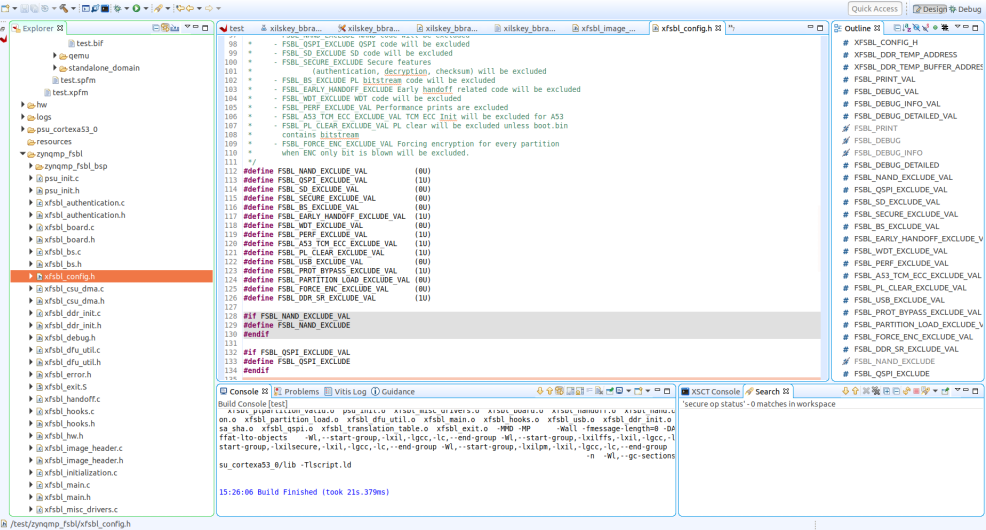
Hi, Please provide us the detail on How to work with DFU-Util? Attached the changes done. Steps followed by us for USB boot mode: Downloaded dfu-util tool (dfu-util 0.9) on linux pc followed this link --> https://xilinx.github.io/Embedded-Design-Tutorials/docs/2022.2/build/html/docs/Introduction/ZynqMPSoC-EDT/8-boot-and-configuration.html#boot-sequence-for-usb-boot-mode modifed xfsbl_config.h file and system-user.dtsi file (attached here) booted through SD card mode after built after above changes on linux host pc --> tried this command sudo dfu-util -l but couldnt get any device listed. Please help. Thanks, saravanan system-user.dtsi
-
Dear @JColvin Thanks for the reply. We tried to create the obfuscated key for encrypting the boot image. As it is mentioned in the Zynq-ultrascale tecnical reference manual document Obfuscated key is AES key encrypted (obfuscated) with the family key of the ZynqMP SoC. The family key is the dedicated embedded key in the device and the same key is used on all devices within a device family. Is digilent will provide the family key to encrypt the user key? Thanks, saravanan
-
hi, We planned to program the BBRAM and eFUSE for storing the encryption keys. As they mentioned in the below document states that XLWP tool is not opensource(need to contact the sales team). https://docs.xilinx.com/v/u/en-US/xapp1319-zynq-usp-prog-nvm Is diligent will provide the XLWP tool for programming the BBRAM and eFUSEs? Is there any other method to program the BBRAM and eFUSEs for GenesysZU5EV board? Thanks, saravnan
-
Hi, We have created the signed image and copied (BOOT.BIN)to SD card and loaded in EVK(GenesysZU5EV board). The board is booted successfully up to u-boot. We used the bootgen verify command to check the created BOOT.BIN file.The bin file includes the FSBL/PMUFW/ATF/system.bit/u-boot. The log information is below xsct% bootgen -arch zynqmp -verify BOOT.BIN ****** Xilinx Bootgen v2019.1 **** Build date : May 24 2019-14:54:05 ** Copyright 1986-2019 Xilinx, Inc. All Rights Reserved. --------------------------------------------------------------------- Verifying Header Authentication Certificate SPK Signature Verified Header Signature Verified --------------------------------------------------------------------- Verifying Partition 'zynqmp_fsbl.elf.0' Authentication Certificate BootHeader Signature Verified SPK Signature Verified Partition Signature Verified --------------------------------------------------------------------- Verifying Partition 'pmufw.elf.0' Authentication Certificate SPK Signature Verified Partition Signature Verified --------------------------------------------------------------------- Verifying Partition 'pmufw.elf.1' Authentication Certificate SPK Signature Verified Partition Signature Verified --------------------------------------------------------------------- Verifying Partition 'pmufw.elf.2' Authentication Certificate SPK Signature Verified Partition Signature Verified --------------------------------------------------------------------- Verifying Partition 'system.bit.0' Authentication Certificate SPK Signature Verified Partition Signature Verified --------------------------------------------------------------------- Verifying Partition 'bl31.elf.0' Authentication Certificate SPK Signature Verified Partition Signature Verified --------------------------------------------------------------------- Verifying Partition 'u-boot.elf.0' Authentication Certificate SPK Signature Verified Partition Signature Verified --------------------------------------------------------------------- Authentication is verified on bootimage BOOT.BIN 1. Is the Image loaded in the EVK is authenticated when booting? 2. How to confirm the authentication is done for the signed image when booting? 3. Is there any serial logs will prints the authenticated information? Help much appreciated Thanks saravanan
-
Hi Kvass, We didn't have HS1 connector with us. We were trying to flash the target via USB cable(microUSB - J8 Port ) with help of xilinx tools (XSDB tool). We are able to load BOOT.BIN binaries into RAM memory via USB cable from XSDB tool. But we our requirement to flash the binary into QSPI flash memory via USB cable using XSDB tool. Any idea on how to flash QSPI memory via USB cable using xilinx tools? Thanks, Saravanan
-
Hi Kvass, Thanks for your reply. We didn't have any HS# connector or FMC connector connected to the board. We just used micro USB cable connected to J8 port. We tried to connect only micro-USB on J8 port and started hw server. But couldn't able to connect to board. Thanks, Sarvanan
-
Hi, Hope you're doing good. We flashed boot image through SD, QSPI successfully following docs. Now we are trying to flash boot image through JTAG via microUSB but we are unable to flash image through JTAG. Steps: 1. Changed boot mode switch to JTAG mode. 2. Connected microUSB cable to hostpc(linux) & target board. 3. Tried to connect jtag via hwserver tool, vivado, petalinux hoping we can able to flash through the software tools. But we weren't able to flash. Questions: Can we able to flash the image through JTAG mode using microUSB cable? Is that we are missing something? Please Help! Thanks, Saravanan
-
Hi @JColvin Thanks for the reply. We tried with the above steps the error is resolved. With the generated xsa file configured the petalinux project, generated and copied the BOOT.bin,boot.scr and image.ub, rootfs.tar.gz file to the SD card with FAT32 and EXT4 partition. when power up the board there is no log message in display(connected in putty). Tried to use the example project but in the project_info.tcl have the lines to set the board part property as like below. set_property "board_part" "digilentinc.com:gzu_5ev:part0:1.0" $project_obj while run the below command as mentioned in the getting started guide issue occurs as board part is not supported. source ../digilent-vivado-scripts/digilent_vivado_checkout.tcl Thanks saravanan
-
Hi, For genesys ZU5EV board, i created the simple block design to generate the Hardware Description file(XSA) for using in petalinux project to run configure command. When run the validate design showing error. ERROR: [BD 41-758] The following clock pins are not connected to a valid clock source: /zynq_ultra_ps_e_0/saxihpc0_fpd_aclk Find the block design below. What are all IPs to be connected for genesys ZU5EV baord to generate the xsa file? Is there any example block design available for the ZU5EV board? Thanks saravanan

-
Hi @JColvin We tried with steps mentioned in the above link and the board files are added to the tool. We tried the same above steps to recreate and generate the *.xsa for the above project,but still we are facing same issue as the board part file is not supported. Is there any thing we missed? Thanks saravanan
-
Hi, Recently we bought the Genesys ZU 5EV board. By using getting started guide link we tried experiment to build the vivado project to generate the HDF file. Below link we refer to down load the project. https://github.com/Digilent/Genesys-ZU/tree/5ev/oob/master?_ga=2.41562411.885368752.1662031212-79180258.1662031212 https://github.com/Digilent/Genesys-ZU-HW/tree/5ev/master We used the Vivado 2020.1 version.But we facing the issue(find in the attachment) when run the below command source ../digilent-vivado-scripts/digilent_vivado_checkout.tcl We required the XSA file to process further to build and generate the binaries using petalinux tool. Could you please confirm about the why the issue occurs in the vivado tool Is there anything we missed? can you share the HDF(XSA) file for the ZU5EV board? It will be helpful us to proceed further. Thanks saravanan


